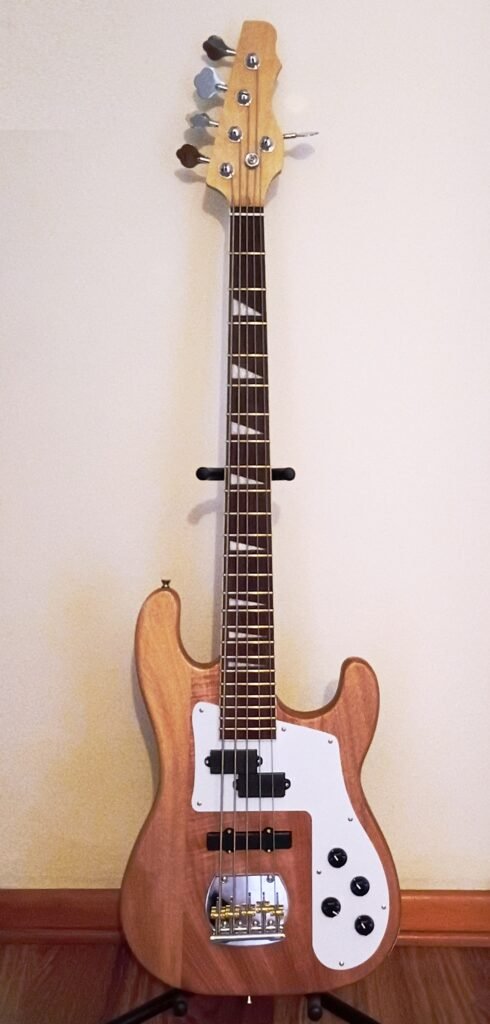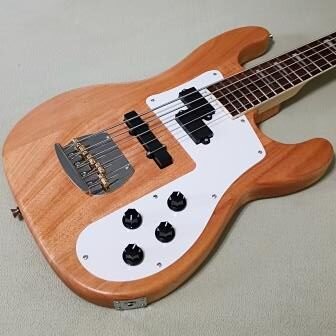

I’m a bass player, and I really enjoy building a good bass guitar kit. This is a brand new kit from Vibeworks Guitars, and it was an exciting build.
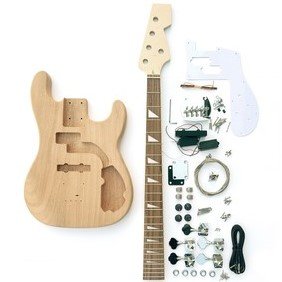
R-Style 5-String Bass
This is a big bass. The body is slightly oversized, and with the 24-fret neck and 4×1 headstock, it comes in well over 4 feet long. It’s not too heavy (mine weighed in at 9 pounds, 3 ounces), 34-inch scale, and actually quite comfortable to play. Mine has a touch of neck dive, with the longer headstock and the five Fender-style open gear cloverleaf tuners, but a nice, wide strap easily takes care of that.
Vibeworks Guitars describes this as an “R-Style PJ 5-String.” The “R” of course refers to Rickenbacker, though Rickenbacker has never had a “PJ” bass in it’s standard line. The shape is more reminiscent of a Fender Precision with one noticeable difference: the location of the neck, like the Rickenbacker design, is offset to the top side rather than being centered on the body. That gives this completed kit the unique Rickenbacker feel. And, as you can see, the pickguard, control cavity, and control layout mimic the Rick look.
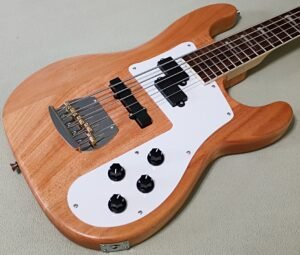
Cease and desist letters are in the news again, and Vibeworks Guitars didn’t risk the lawsuit. But if you want a more authentic Rick-style bass, you can do something a seller like Vibeworks can’t do – shape it yourself. Check out Vibeworks’ Slab Bass kit. You can recognize the pre-routed layout; all you need to do is cut it out. Make the body any shape you want, and make the headstock any shape you want, including… well, you know. As long as it is just for you and you aren’t selling anything, you are good.
A Little About Vibeworks Guitars
When I started building DIY guitar kits in 2022, one company in particular was getting rave reviews: The Fretwire. But after several attempts to get a Fretwire kit, I gave up. They were simply unable to ship what I had ordered. Then, they disappeared from the scene altogether. Later I was able to find and build a few Fretwire kits being liquidated by various sellers. They were great, high quality kits, but unfortunately no longer being made.
Then, not too long ago I came across guitar kits from Vibeworks Guitars, and recognized several of them as being the Fretwire kits I had already built, and still others as Fretwire kits that I had not been able to get! I contacted the owner, Sam, who told me a little about his company. Then I found Sam had this posted on his Vibeworks Guitars website:
I started The Fretwire in 2014. Many of you may have bought a guitar kit from me then. It grew to be a great brand that people trusted. In 2021 I sold the company to an eCommerce firm. Unfortunately they made some dumb changes, lost a lot of trust, and eventually closed in late 2022.
In 2023 I decided to reopen as Vibeworks Guitars, based in Salt Lake City, Utah. I have loved reconnecting with many customers and friends, and I am happy to once again be trusted source for DIY Guitar kits, Parts and Tools.
Same kits, same quality, different name. But my experience with The Fretwire (after Sam had sold it) was a disappointment. Could Vibeworks Guitars actually deliver one of these top quality DIY guitar kits? Well, read on…
Vibeworks Guitars R-Style PJ 5-String Bass Kit
My order was placed on a Monday morning. I received the order acknowledgment by email, and soon afterward an email notification with the tracking number. Three hours later, FedEx had it in their possession. FedEx gave me an estimated delivery date, but because of a delay on their end (and a holiday) it arrived a couple of days late – no fault of Vibeworks Guitars.
Like I said, this is a very big bass, and it didn’t quite fit in the box – specifically, the 24-fret neck and extended headstock created a bulge in the packaging. But it provided sufficient protection and arrived with absolutely no damage. All components were there, nothing was missing, though there is no “parts list” to check off.
I first inspected the body and neck, then did a test fit. The alder body was sanded smooth and I found no rough cuts or splintered edges at the routing. The three-piece construction was reasonably well matched. When checked by sight and verified with a notched straight-edge, the neck was straight and flat with no signs of any twist. I could feel sharp fret ends as I ran my hand along the edge, which would have to be addressed later.
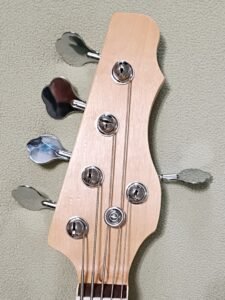
After an inspection of the body and neck, I went to work on the headstock. This came with a blade headstock (not exactly as pictured in the listing), so I could do whatever I wanted within reason, being careful to get the proper edge distance at the G-string tuner mounting as I started removing material. This is the end result of my work, and I’m quite pleased. The two concave arcs were made by wrapping 100 grit sandpaper around a large coffee can and a spray paint can, slowly bringing it into the shape I wanted. Through past experience, I have learned NOT to use a jigsaw, hand coping saw, or anything more powerful than a Dremel on the headstock. Now I just use sandpaper. It is slow, but accurate and much, much less risky.
I prefer a natural finish and avoid painting whenever I can (maybe I’m just not good at it). Wiping the body down with mineral spirits gives a very good indication of how a finished product will look. I was satisfied with that, and after allowing it to dry gave it a final sand before applying Tru-Oil Gunstock Finish. Several days and several coats later, I had a very nice looking bass body. For the neck and headstock, I used my go-to Minwax Tung Oil Finish, which leaves a less glossy look and feel to the back of the neck.
Putting It All Together
There are no specific assembly instructions with this kit. A sheet inside the box has a link (complete with QR code) to the Vibeworks Guitars website page. There you can find a downloadable master instruction file (pdf) as well as a library of wiring diagrams. It also features an excellent interactive step-by-step checklist linked to YouTube videos that walk you through assembly.
I’ve built many different DIY electric guitar and bass kits, and didn’t have any problem with this one. Remember, even though it is a big and somewhat unique looking product, it is ultimately just a PJ bass – fairly simple and straightforward.
One thing to keep in mind with Vibeworks Guitars DIY kits is that you will need to solder the electronic components, which ship loose. It isn’t hard, and the assortment of wiring diagrams on the website covers about anything you need. For this bass, just use the “2 pickup – no switch – 2 volume 2 tone” diagram and you are all set. Now, I started out with that wiring but I am not a fan of that particular configuration. After assembly, I purchased a three-way switch and changed to a “2 pickup – 3-way switch – 2 volume – 1 tone” configuration – this diagram is also on the Vibeworks Guitars website. One hole on the pickguard did need to be enlarged – very carefully! I used a rotary switch, so the front controls still look the same.
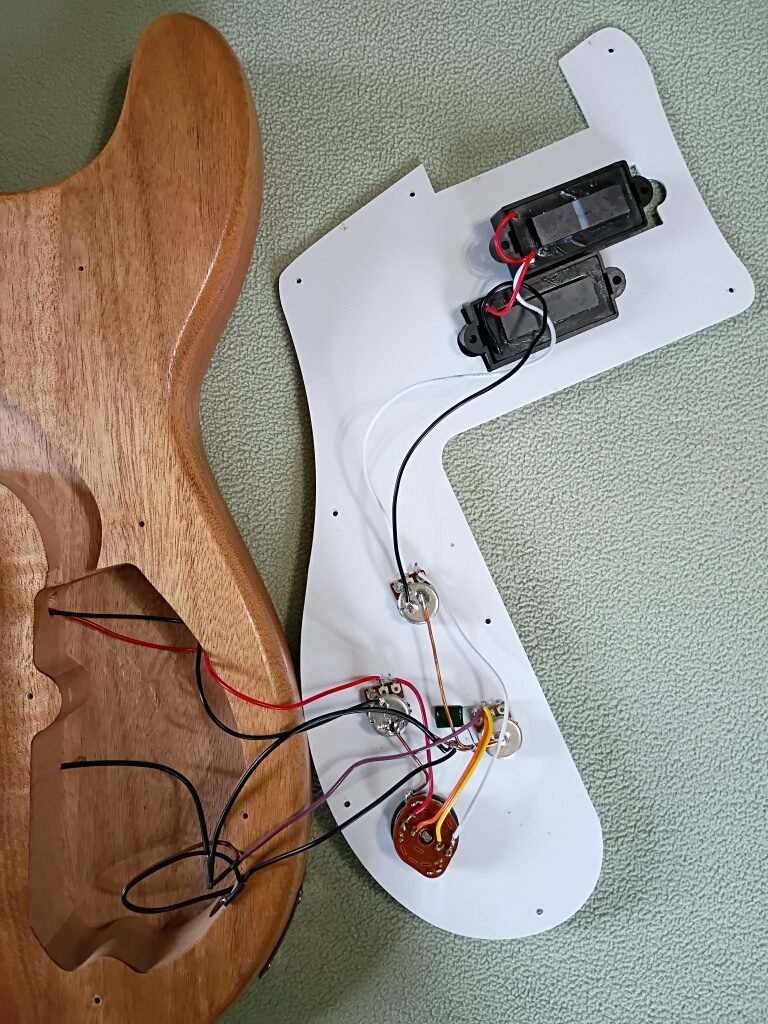
If you absolutely do not like to do wiring, you can purchase a pre-wired harness at Amazon and it will work fine (the capacitor may be a little different value). That will require only minimal soldering to attach the pickups to the pots. Put a ground wire underneath the bridge and use a small wire nut to connect it to the harness.
After the wiring is complete, the rest all goes together very quickly. Setup is also straightforward. I made a few changes to suit my preferences, adding a shim to the neck so I could get a little more height at the bridge, and changing out the saddles for a slightly narrower brass saddle. That’s the advantage of starting with a quality kit – you can make changes like that without risk. With some cheap kits, one little change requires another and they compound until, well, you were better off just to leave it alone. And as always, I tossed the strings that came in the kit and put on a set of D’Addario EXL170-5 strings.
The Bottom Line
This is a fantastic 5-string bass kit, sold by an awesome company. It has a unique appearance and may initially look intimidating to tackle, but it’s really just a PJ bass kit. The 3-piece alder body is good quality, pre-sanded and pre-routed, and looks beautiful with a natural Tru-Oil finish. I found the maple neck straight and flat, with the pre-drilled holes for the tuning machines and screws already perfectly aligned. There is a dual-action truss rod for relief adjustment. The 24-fret rosewood fretboard has attractive triangular inlays, and I did have to do a little bit of work on sharp fret ends.
The included hardware is decent quality, much better than some of the inferior knock-offs I’ve found in some kits (like Pango). The open-gear tuning machines were initially a little stiff, but a dab of lubricant cleared that up instantly and I see no need to upgrade them (though you could if you wanted). Pickups sound good so I haven’t researched any upgrades there. As previously mentioned, I put on some better quality strings.
There is nothing difficult about assembly; I’ve mentioned in other posts that a bass is one of the easiest kits to build. When you’ve finished, do a complete setup in the proper sequence. The result is an instrument you can proudly play.
Remember, you will need to shape the headstock and you will need to solder the electrical components, so plan appropriately. You have time to do those things while waiting for the finish, whether oil or paint, to properly cure. Then follow the step-by-step interactive instructions on the Vibeworks Guitars website for a great looking and sounding instrument.
It’s big, too big for a standard hard case. But it fits nicely in a Gator GBE-BASS gig bag, which only runs about $30 and provides a fair amount of protection. Even though the bag says it is for a 47-inch bass, I’ve got two of them and they both measure almost 50-inches inside, plus they are wide enough at the top to accommodate the 4×1 cloverleaf tuners.
If you are thinking of building a 5-string DIY bass kit, go for this one. You will not be disappointed.