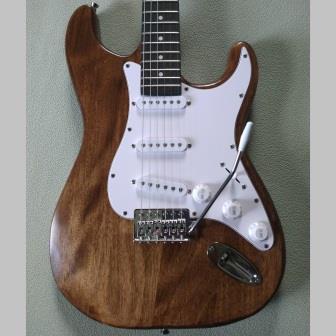
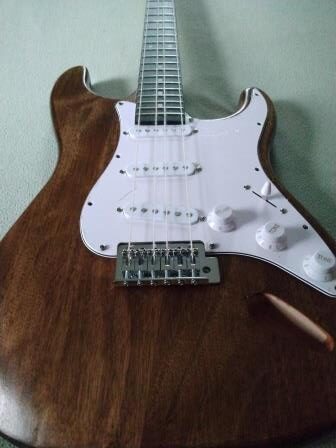
Building a basic Stratocaster, or simply “Strat” style DIY guitar kit like those from Fistrock or Leo Jaymz on Amazon, offers a reliable way to get a custom instrument without having to start from scratch. I’ve put together several Strat kits over the years, and each one feels pretty rewarding when the last string is tuned up and everything plays well. Assembling your own Strat comes with decisions about finishes, parts, and even electronics, and I’ll share what I’ve learned to help you make the process smooth and enjoyable.
Putting together a Strat kit gives you a hands-on look at how guitars work. Kits usually arrive with the body and neck unfinished, electronics pre-wired or ready for simple soldering, and all the basic hardware included. Careful preparation, patience, and a few extra tools can make the build enjoyable, even for a first-timer. Below, I’ll walk you through everything from unboxing to plugging in for that first jam. Let’s get into each step in detail and make sure your first kit build is a total success. But first, let’s just look at how the Strat came to be.
History of the Stratocaster Guitar
On April 10, 1954, Leo Fender patented the electric guitar known as the “Stratocaster” on April 10, 1954. It would become one of the most iconic instruments in music history. Building on the success of his previous design, the “Telecaster,” Fender aimed to create a more versatile guitar appealing to a wide range of musicians. The Stratocaster featured a contoured dual cutaway body for greater comfort, three single-coil pickups for more tonal variety, and a unique synchronized tremolo system.
The Stratocaster was favored by guitar legends like Jimi Hendrix, Eric Clapton, and Jeff Beck and quickly earned a reputation for its sleek design, playability, and the wide array of sounds it could produce. It became a favorite among rock, blues, and surf musicians. The Stratocaster’s ability to deliver everything from bright, sharp tones to deep, rich sounds helped solidify its place as a staple in both live performances and studio recordings.
The Telecaster had already made a name for itself as a pioneering electric guitar, and the Stratocaster further solidified Leo Fender’s legacy in modern music. Its widespread popularity speaks to its timeless design, and it has remained a symbol of musical expression and innovation in the world of electric guitars.
Kit Preparation and Organization
As soon as I open a guitar kit box, I examine the body and neck for obvious damage. These are critical, and if they are unusable there isn’t much point in going further. Then I make a quick check of the other components. Most Strat kits include the body, neck, tremolo bridge, pickguard with pickups, tuners, electronics, and all screws and springs you’ll need. Missing any part can hold up your build, so taking a minute for inventory is always worth it.
Inspecting Your Kit
- Check the neck for straightness by sighting down the fretboard. Look for twist or bowing.
- Examine the body and neck pocket; make sure they match up neatly and that all holes line up well.
- Look for rough spots, chips, or sanding scratches in the wood. A quick sand can handle most flaws.
- Look for glue spots or repairs of cracks that may affect the finish. These can be subtle.
- Make sure the kit includes every screw, spring, and hardware piece needed.
Choosing and Applying a Finish
This is one of the most important steps. The Strat’s body usually comes unfinished or with only a light sealer. If you are going to stain or dye the body, it will be necessary to sand the sealer off. If you’re just getting started, try out finishing techniques on leftover wood before digging into the real body. Remember, the finish protects as much as it decorates.
Popular Strat Body Finishes
- Stain/Dye and Clear Coat: This leaves the wood grain visible, great for figuring or interesting grain patterns.
- Solid Color: Use quality spray paint or nitrocellulose lacquer for classic Strat vibes.
- DIY Sunburst: Achievable with practice, but it can be tricky without airbrush tools.
- Oil Finish: For a matte feel, I sometimes use Minwax Tung Oil Finish or Tru-Oil gunstock finish, which is easy to apply by hand but requires more maintenance long term.
Finishing Tips
- Sand the body up to 400-grit or finer before applying anything. This makes the finish smooth and even.
- A grain filler may be needed on woods with open grain such as mahogany.
- Keep the workspace dust free. DIY guitar bodies love to pick up dust in fresh paint or lacquer.
- Allow plenty of drying and curing time. Rushing leads to fingerprints, dents, or cloudy finishes.
- If you want a truly eye catching look, try out metal flake or pearlescent topcoats.
Neck Fit and Alignment Techniques
Getting the neck lined up straight is super important. Even with CNC cut kits, there can be a bit of wiggle room in the neck pocket. If the neck is angled even a few millimeters off, your strings might fall off the fretboard edge or intonation gets weird. Taking extra care with this part makes a huge difference in playability and tuning for years to come.
Start by installing the items on that will be on both ends of the strings. Install the tuners in the headstock, being careful with the small screws so that you don’t spin off the tops. Tighten the bushings with a 10mm wrench.
Put the pickguard in place on the body, using just two or three screws at the moment. Make sure it does not overlap the neck pocket. We will leave this pickguard in place while installing the neck to insure proper fit.
The tremolo bridge likely has six screws in front of the saddles that hold it to the body. Since these pre-drilled holes will be difficult to change, I consider this to be a fixed point for alignment. Install the bridge with all six screws, but don’t worry about the springs and claw on the back yet.
How to Align the Neck Perfectly
- First install all of the neck screws through the neck plate, driving them into the body only as far as the surface of the neck pocket. I always drag the screws across a bar of soap first.
- Fit the neck solidly into the pocket, pushing it as far as it will go toward the bridge. Then use a clamp to make sure the neck tight against the back of the neck pocket.
- Drive the neck screws into the neck itself, but do not tighten them all the way. Always do this by hand, not with a power driver.
- Temporarily install kite string in the 1st, 3rd, 4th, and 6th string saddles, taking the kit string across the neck and around the corresponding tuners. The kite string does not need to be real tight, but don’t leave any slack.
- Visually inspect the alignment of the strings around the fret position markers and the fretboard edge. I nudge the neck as needed until everything looks centered.
- Tighten the neck screws (again, by hand!), confirm alignment, and remove the kite strings. You can now remove the loaded pickguard and set it aside until later.
Bridge and Tremolo Setup Considerations
The Strat bridge is a key detail to get right. The bridge plate should sit flush to the body at rest and pivot easily for tremolo action. Getting the height, angle, and spring tension right makes it stay in tune and feel natural under your hand. Take extra time here, especially if you use the tremolo during playing.
Steps for Proper Tremolo Installation
- Leave them barely snug. Press the bridge plate down to the body and back out the screws a tiny bit (maybe 10 degrees) so the bridge can pivot freely.
- Attach the claw and all springs inside the cavity, then install the strings and bring them to pitch.
- Adjusting the claw position changes the tension of the springs. Drive the claw screws in so the bridge sits in parallel to or slightly above the body with strings at pitch.
- If I want to float the tremolo (raising pitch as well as lowering), I back the claw out a little and use three springs. If I want a fixed bridge, I tighten the claw and, if necessary, use up to five springs (chances are, only three came with the kit). Try both setups to track down your favorite feel.
Wiring and Electronics
Some kits arrive with the electronics prewired to the pickguard, usually the classic three single coil strat setup (SSS). Others may need basic soldering; often just attaching the ground wire, output jack, and maybe the pickup wires. For first timers, following a wiring diagram closely will help smooth the way and prevent mistakes. It’s fun to jump into this step, but don’t rush it—neat wiring avoids future headaches.
Wiring Steps I Follow
- Make sure all pickup and ground wires reach their destinations before screwing in the pickguard. There is a ground wire that passes through the body and attaches to the claw.
- If swapping pickups or pickguards, fit the parts together and test all solder joints for secure connections.
- Before finalizing assembly, plug into an amp, and tap each pickup with a small screwdriver to see if they’re working. The standard 5-position switch configuration is
- Just the bridge pickup
- The bridge and center pickup together
- Just the center pickup
- The neck and center pickup together
- Just the neck pickup
Pickguard and Pickup Configurations
Kits nearly always ship with the classic three single coil (SSS) pickguard, but swapping to a loaded HSS (humbucker-single-single) or HH (dual humbucker) pickguard is popular. Whether you want vintage tones or a beefier rock sound, pickguard swaps offer quick change with minimal extra work.
Reasons to Swap Pickguards
- Changing Tones: Want heavier rock tones? HSS or HH gives you more output and variety.
- Less Soldering: Loaded pickguards are prewired. Just drop them in, connect the jack and ground, and you are ready to play.
- Style: Different pickguard colors or materials can add a personal touch and make your build really stand out.
When swapping, it is sometimes necessary to slightly widen the pickguard cutout or re-drill mounting holes so it lines up perfectly. If you aren’t sure which configuration to go with, check out online sound clips to compare setups and get a sense of the tones you like most. Experimenting here can pay off big for your personal sound.
Final Assembly and Setup
With the wiring done and neck attached, screw the pickguard and hardware onto the body. Here is another instance where taking time is important; a stripped screw in soft wood is very frustrating. Thread them in by hand and only tighten them as much as needed. Rushing at this stage can ruin your careful work, so patience is key.
For proper setup of your Strat style DIY electric guitar, follow the steps in my article on the TRAIN Method of Guitar Setup.
If you run into any snags or want advice on upgrades, there are some great online forums and dozens of YouTube videos with kit build walkthroughs. Building a Strat kit can really make you appreciate the instrument more while learning guitar maintenance along the way. Whether you’re looking for your first electric guitar or itching to dig into a new project, a Strat style kit is a fun, hands-on way to make a playable and eye-catching guitar that’s truly your own.