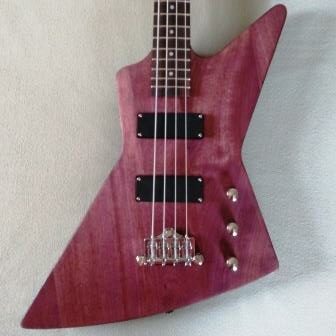
Leo Jaymz DIY electric guitar kits are among the best kits offered for the budget minded builder. There aren’t a lot of options from them, though, for DIY bass kits. This Leo Jaymz DIY Explorer bass kit was a lot of fun build, pretty easy to set up and play, and it turned out looking great.
Like other Leo Jaymz DIY kits, this one is great quality for a low price. It has heavy chrome hardware and pretty good electronics – but of course, those things are easily upgraded. The most important part of the kit is the wood, and this mahogany was wonderful. Sections were well matched and all of the joins flat. And for this kit, even the headstock is already shaped.
I actually purchased this kit from another party. He had bought it through Amazon (the best way to get DIY electric guitar kits because of their customer protection and easy return policies). He painted the whole thing flat black using automotive lacquer, including the back of the neck. Of course, he had taped off the fingerboard. Then he decided not to finish it, and I ended up with it. Everything was there, just as he received it, except that it was now black.
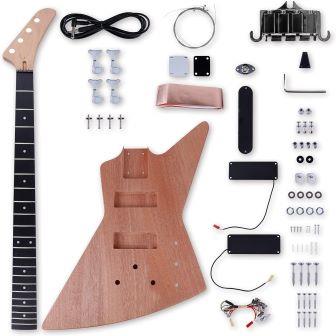
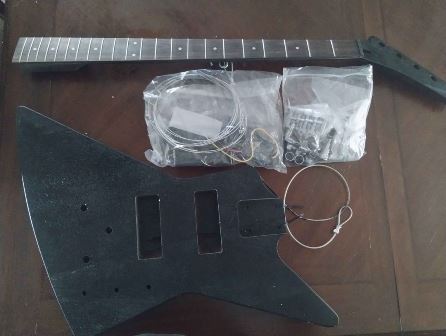
I decided to finish it similar to another Explorer I had built using a burgundy Keda Wood Dye blend on the mahogany with a top coat of clear lacquer. For this one, though, I left the back and sides black. It took a little work, but I successfully sanded back just the front of the guitar. Then I sanded off all of the black on the neck and finished it with Tru-Oil Gunstock finish.
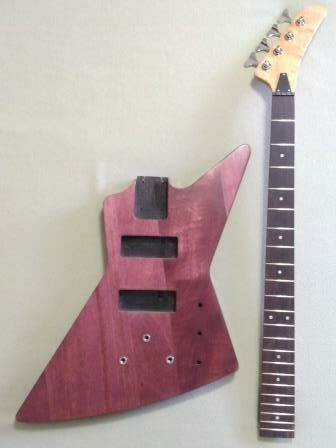
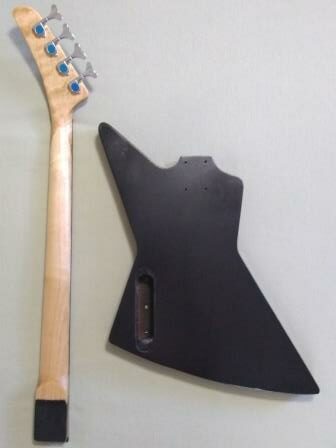
Test Fit for the Leo Jaymz DIY Explorer Bass
This kit has a bolt-on neck, which was much easier to assemble and adjust than the glued set neck my previous Explorer project had. And it turned out that having the bolt-on neck made setup a lot easier with better results as I will describe later. The neck fit snugly in the pocket, so I checked the alignment. I installed the tuning machines in order to properly line up the neck. This kit uses heavy butterfly-style machines, very good quality, installed using a 15mm wrench.
With this design, neck alignment becomes critical. There are three bushings that hold the bridge, similar to what you find with a Tune-o-matic style bridge. The holes are pre-drilled, which is great, but the position is fixed. Changing it would require plugging the holes and carefully re-drilling. Fortunately everything lined up spot-on, attesting to the quality of the Leo Jaymz DIY kits.
You can see the great alignment in the pics below. I used kite string to check, pulling tight to hold the bridge in place. Everything lined up perfectly, checking the strings over the position markers and the equal distances from the edge of the neck.
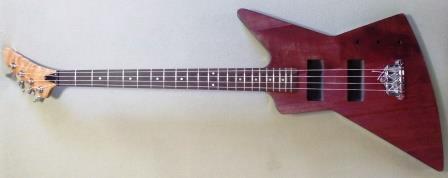
Assembling the Leo Jaymz DIY Explorer Bass
Assembly was very easy. I checked and rechecked alignment all along the way, and never found any issues. I marked and drilled the neck, installed the bushings (remembering to put the ground wire in place!) and positioned the bridge. At every step, the kite string confirmed we were in good shape.
The bridge in this kit is exceptionally nice. It slid nicely in to position over the posts, the front post being smaller than the back two. Each saddle is slotted for that specific string, with the E saddle having a much wider slot than the G saddle. The saddles are loose and fall out without strings in place, but they are properly marked for correct placement with the letters E, A, D, and G. I guess they do assume you are using standard tuning.
Before going further, I put a set of real bass strings on, though not the final set. These are just strings that I use during assembly of a bass to make sure everything will fit. What I discovered was that, though the alignment was perfect, the neck angle was such that the action was too high even with the bridge all the way down. This is why a bolt-on neck is great. I removed the neck, put a shim in the end of the pocket, and reinstalled the neck. Now the neck angle was good, action was considerably lower, and the bridge was raised so that there was some adjustment.
Pickups were a perfect fit in the cutouts, and being black without exposed poles they look great with my chosen color scheme of the burgundy face trimmed in black. The wiring harness goes in from the back, and Leo Jaymz kits are plug in components except for the ground wire, which I chose to solder. You could install the wiring harness before putting in the bridge bushing and use the ground that is already attached, so no soldering would be required. I use the assembly sequence described here just so checking alignment along the way is easier.
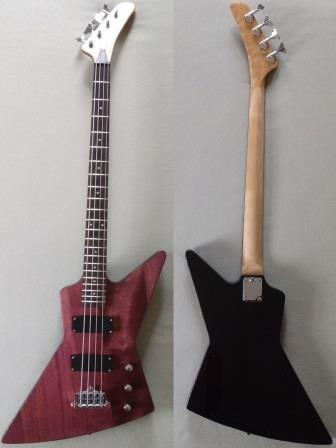
The Finished Leo Jaymz DIY Explorer Bass
One modification I made involved the strap pins. On an Explorer with a set neck, the strap pin is usually located on the back, just behind the neck at the top of the guitar. That’s a perfect place for balance and security for your strap. But on the bolt-on models, they generally locate them where the upper horn would be, except an Explorer doesn’t have an upper left horn. With the pin on the edge of the body, which I did on my 6-string Explorer kit, my strap looks like it could slip off at any moment. So, for this bass I decided to drill through the bolt-on neck plate and put the pin where it would normally be on a set neck. It looks great, feels great, and I’m not worried about the strap pulling off.
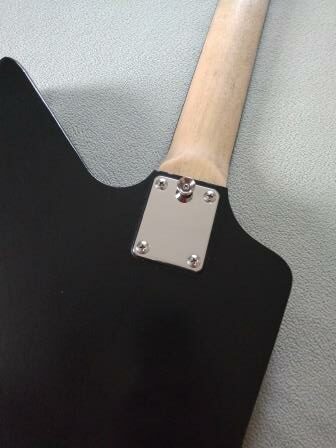
As always, I don’t use the strings that come in the kit. For this big bass, I chose D’Addario EXL170BT round wound strings with balanced tension. The string break angle at the hockey-stick headstock is not nearly as much as on the 6-string Explorer. So, this bass is not difficult to tune at all, and it stays in tune.
The neck did not require a lot of work, just a quick polishing of the frets and some Dunlop Fretboard 65 Lemon Oil for the rosewood fingerboard. There were no sharp fret edges at all, and a fret rocker proved them to be already nicely leveled – another thumbs-up for Leo Jaymz kits. I loosened the truss rod slightly to get rid of some backbow, and measured the relief at the 8th fret (with the 1st and 17th fretted) right at about 0.010 inches.
I have to say I am extremely pleased with how this turned out. It is pretty heavy, though, weighing in at nearly 9 pounds! The body is large, and it is a 34-inch long scale. Overall, this is a little longer than the 6-string Explorer kit I built. With a 48-inch length, the large X-shaped body just misses fitting in the Gator Extreme Gig Bag.
Conclusion
Overall a fun and easy build. You just can’t go wrong with a Leo Jaymz kit. I would highly recommend this kit for beginning builders, and it offers lots of room for customization for experienced builders.
Check out the Leo Jaymz store at Amazon for a full listing of what they have available.
Have you built a Leo Jaymz kit? Did you try the Leo Jaymz DIY Explorer bass kit? What was your experience? Please leave a comment below.
