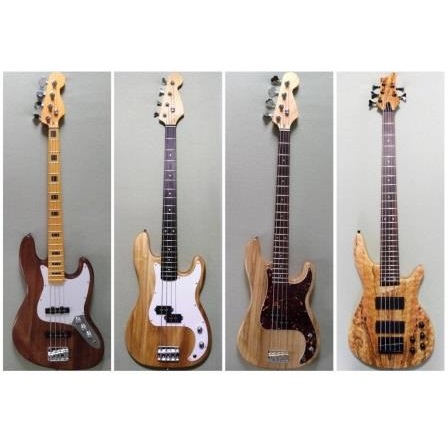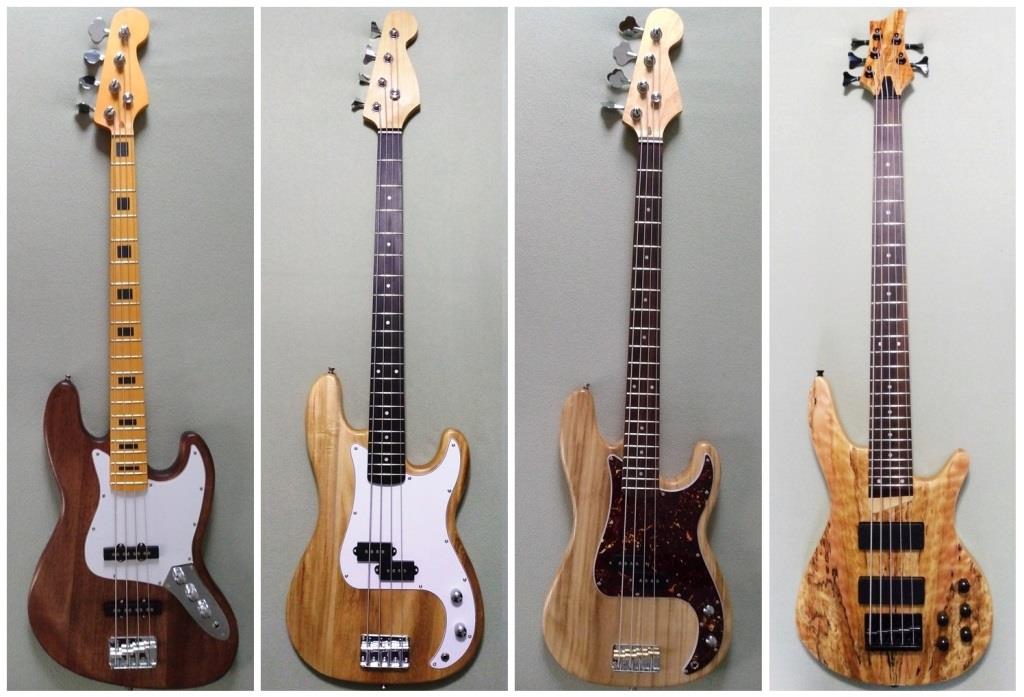
I’ve been a bass player since my teens. So when I reached retirement age and started building DIY electric guitar kits, it was natural to start with a bass. Here are a few of them I have built so far, and I most certainly am not done yet. I hope you enjoy them.
A Jazz Bass Style Kit
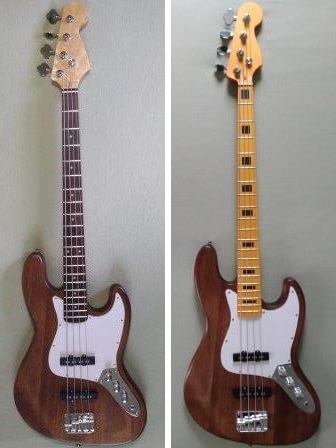
My first DIY electric guitar project was a Jazz-style bass. In fact, the first bass of my very own was an Aria Jazz-style bass I bought back in 1978. I had played my dad’s bass growing up, but that Jazz bass was the first one I could call my own. I wish I still had it.
You can read about my DIY Jazz bass kit building experience in my post My First DIY Electric Guitar Kit. At first I was very hesitant, never having done much woodworking of any kind before. I was fortunate to find a DIY electric guitar kit vendor close by, and he allowed me to look at the various kits he had available and pick out the one I wanted. He has since moved to another state.
This Jazz bass kit had a mahogany body, maple neck and rosewood fingerboard. I had to shape the blade type headstock, no doubt the most difficult part of this kit. I stained the body dark, then used Minwax Wipe On Poly to finish it off. The neck has Minwax Tung Oil Finish and the rosewood fingerboard is treated with with Dunlop Fretboard 65 Ultimate Lemon Oil.
Later on I realized that this Jazz-style bass kit had a Precision-style neck. The nut was 42mm wide, and it should have been 38mm wide. It had been so long since I played a Jazz bass that I didn’t catch the discrepancy. By the time I caught the error I had built several other DIY electric guitars, so I figured swapping out the neck wouldn’t be a big deal. It wasn’t. I found a nice maple 38mm neck and made the switch, but that left me with an extra neck. Somehow that transformed itself later on into a whole new bass guitar.
A Precision Bass Style Kit
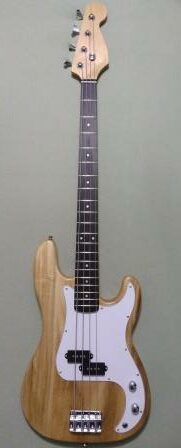
My next DIY bass project was a Precision-style bass. I have a very nice Peavey T-20 that I bought new in 1983. I don’t know exactly what the wood is, but this thing weighs a little over 10 pounds. The Jazz style kit weighs in a little lighter at 8 pounds 12 ounces. Then I came across a P-bass kit that I knew would weigh quite a bit less, so I thought I would give it a shot. It was made of paulownia.
My first Precision-style bass kit was made by Fistrock, a brand marketed by L&Y and sold on Amazon. I’ve purchased other products from L&Y and have been very pleased, so I didn’t really have any concerns about this DIY bass guitar kit. It arrived quickly, and was relatively easy to assemble. This kit also had a blade type headstock, which I shaped into a standard Fender Precision Bass design. You can read more about this in my post How to Shape a Headstock.
The paulownia wood, besides being lightweight, has a beautiful wide grain. I finished this kit entirely with Minwax Tung Oil Finish to let the beauty of the paulownia shine. The fingerboard is dyed poplar, and I treated it just like rosewood fingerboards with Dunlop Fretboard 65 Ultimate Lemon Oil. You can read my full review of this kit in my post Fistrock P-Bass DIY Guitar Kit Review.
The completed Paulownia P-bass weighs 6 pounds 8 ounces, much less than my Peavey. Most of the weight, though, is in the neck so it does feel a little bit different. However, the P-bass design of the body places the upper strap pin right at the 12th fret, so overall the balance is pretty good while standing and while sitting. It is still a different feel than the heavier Peavey or Jazz-style bass.
A Precision Bass Style from Parts
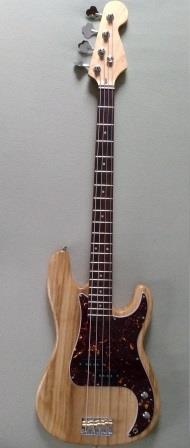
It was after building my first P-style bass that I realized the nut width on it was the same as on my J-style kit. So, as I said earlier, I decided to put a different neck on the Jazz bass, which left me with an extra neck. I couldn’t let that go to waste. Besides that, the Fistrock P-style kit I had built had Ibanez-style tuning machines, and I wanted a P-bass that looked more like a Fender. So, I set out to build another P-style bass from the extra neck and from component parts that I obtained from various places.
I had actually kept the tuning machines from the original J-bass kit on the old neck and put genuine Fender tuners on the new neck. So with that already done, I found a nice P-bass body made from sycamore to complement my old kit neck. For this body I also used Minwax Tung Oil Finish, which gave it a very similar look like the previous kit. Not wanting them to be so identical, I found a darker red tortoise-shell pickguard by Musiclily and installed some electronic components that I already had laying around.
The only other things needed were the bridge, strings, strap pins and neck screws. I bought a Musiclily bridge with brass saddles, again so this bass would look different than the Fistrock kit. It was considerably shorter, but still fine for intonation and I think it helps in differentiating this bass.
The sycamore, like the paulownia, was surprisingly light, and this bass built from component parts weighs about the same as the one I built from the kit. It played the same, and it sounded the same. So, to change things up I went with D’Addario EXL165 Regular Light Top / Medium Bottom strings on this bass and EXL220 Super Light strings on the paulownia bass.
My First 5-String Bass
I’d never owned or even played a 5-string bass. There are a few 5-string starter basses out there that are probably pretty nice, but since I’ve been building DIY electric guitar kits or assembling electric guitars from component parts, I really didn’t want to buy one already made. The nicer 5-string kits I’d looked at were a little more expensive, and let’s be honest here, I’m pretty frugal. I need a good deal.
That’s when I stumbled across an outlet that was selling “Blem B-stock” kits. They wouldn’t reveal the original source, but I was able to recognize a few of the kits they had listed and narrow it down to a couple of reputable kit suppliers. Then one day I saw this 5-string bass kit. It normally sold for about $260, but this “Blem B-stock” was $100. So I took the plunge.
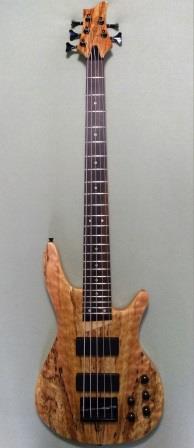
This 5-string bass kit had a spalted maple veneered top, with the same veneer on the headstock. But the headstock veneer had a little chip in it, so it was listed as B-stock. You can barely see the chip. This was probably one of the nicest kits I’d purchased to date, and I wanted it to turn out really well so I took my time with it.
I applied several coats of Tru-Oil Gun Stock Finish on the spalted maple veneer, both on the body and on the headstock. The result was stunning. I also used Tru-Oil on the back and sides, which are ash. For the maple neck and back of the headstock, I went with my old faithful Minwax Tung Oil Finish. This bass has a 24-fret rosewood fingerboard, so naturally I treated it with Dunlop Fretboard 65 Ultimate Lemon Oil.
I love the black hardware. It came with two black humbucker pickups and five controls, but no wiring diagram (the “Blem B-stock” didn’t have any instructions, which would have revealed the brand name). There were two B500 pots, three A500 pots, and three .064uf capacitors, which makes me believe the original intent was two volume and three tone controls. I couldn’t find any wiring diagrams for that without using a preamp, so I changed out one of the A500 pots for a B500 I had in my arsenal, and ended up with a volume and tone for each pickup with a master volume control.
This looks, feels, plays, and sounds incredible. It is truly one of the best kit projects I have ever built.
Conclusion
Bass guitar kits are among the easiest DIY electric guitar kits to build, and I highly recommend them for beginners. Build a couple of simple kits, then try a more advanced kit or try assembling a custom one yourself from components you pull together. Each kit you do, whether a bass, 6-string, or some other configuration, will help you gain valuable experience and build your confidence.
Have you built a DIY electric bass guitar kit? What kit did you choose and why? Share your experience in the comments below.
