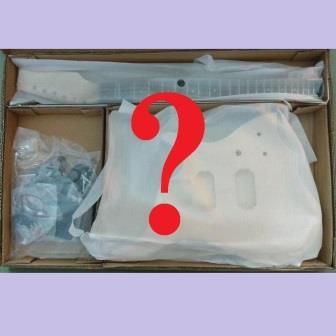
Building your own DIY electric guitar brings a huge sense of satisfaction and accomplishment. Perhaps you have already done one project and are thinking about the next one. Building from a DIY electric guitar kit is straightforward, but maybe you’ve wondered about some modifications or or changes you might like to try.
Besides the pre-packaged DIY kits, many enthusiasts like to build electric guitars ala carte, sometimes referred to as a “Partscaster” guitar. There are several different ways to approach building a Partscaster, each with its own rewards and challenges. What will work best for you and allow you to achieve your goal? For your next DIY electric guitar project, should you build from parts or from a kit?
Advantages of Building from a Kit
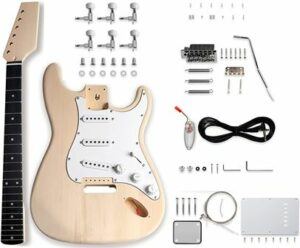
You can find a lot of advantages to building from a kit, especially if you are new to all of this. Maybe the greatest advantage to building from a kit is that the kit is generally all-inclusive. Everything you need to assemble the DIY electric guitar is in the box, with the only exception being what you use for a finish. And most kits come with some kind of instructions – not always good ones, but at least enough to point you in the right direction. There is no need to go searching for components, unless you are just planning to make a substitution for something already included.
Another primary advantage is that the parts, and in particular the neck and body, will fit together properly. As an industry standard, the neck and body for a kit are test-fitted before packaging and any adjustments are made at the factory. The neck and body are then numbered so that they stay together through the packaging process. Sometimes other components, such as a loaded Strat-style or P-bass pickguard, are test-fitted with the neck and body and are appropriately marked with the same number.
I’ve only encountered one situation where the neck and body would not fit together – not even close. In this situation they were numbered as a matched set. But then I discovered that all of the kits had the same number, and clearly they had not been tested together. So, even though this system should be a part of quality control, sometimes it must be a sham. That’s a chance you take with off-brand or generic kits, or maybe more accurately with unknown fly-by-night distributors. Stick with Amazon or other reputable sellers, where you know you can send it back if there is a problem.
Finally, a major advantage with building a DIY electric guitar from a kit is cost. The price of the packaged kit is almost always much lower than the combined price of the individual components. These kits are mass produced, and the manufacturers buy the components in quantity. They get pricing that you and I can’t get, enabling them to sell multiple kits at a lower price and still make money. It’s all economies of scale, and it works in our favor. I have found very acceptable hardware in kits from Leo Jaymz, Fistrock, BexGears, and Solo. On the other hand, hardware from Pango and similar manufacturers is just cheap junk, easily detected from the minimal difference in price with and without hardware.
Limitations of Building from a Kit
Building from a kit does come with certain limitations, though some of them can be overcome. The configuration of the kit is defined by the kit manufacturer. This usually means that you have a limited number of styles, or variations within a style, to choose from. For example, you may want to build a certain body style with a non-standard neck design, or perhaps with a veneer finish that isn’t offered with that style. If you are going to stick with building from a kit, it means you need to choose from what the kit manufacturer offers.
We previously mentioned components purchased by the manufacturer in quantity. These are usually generic components, and while they may be of acceptable quality, you may want to choose a premium component. Again, the kit is limited by the manufacturer’s offering. Most of these items are easily changed out, increasing the cost of the finished project. Some higher-end kit distributors do offer the ability to customize hardware and electronic components.
So, you may want to consider making upgrades to the standard kit on your own. I’ve got a collection of tuning machines left over after upgrading them myself. And electronic components, such as pickups and pots, are good considerations for easy upgrades.
I never use the strings that come in the kit; I have a box full of them, and guess I shouldn’t say “never.” I’ve used them for testing purposes, but I don’t leave them on. For DIY electric guitars, I keep a supply of D’Addario EXL110s on hand and put those on before doing any of the setup work. Bass strings I usually buy at the same time I buy the kit; they are a little more costly to keep on hand and I don’t always use the same kind.
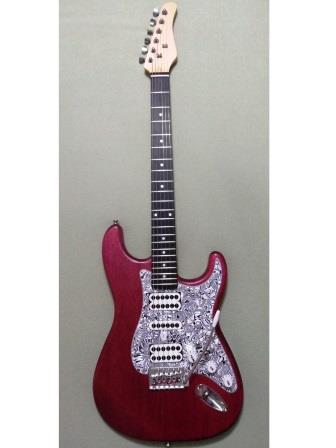
The loaded pickguard on this Strat-style kit was changed out for one with split humbuckers and a great looking pattern. It should have been an easy switch, but this is the kit I previously described with the mismatched neck and body, so it’s not surprising that I had to do a little trimming to make it fit. The end result looks and sounds fantastic, and I was able to sell the generic loaded pickguard from the kit and make up most of what I spent on this one.
Advantages of Building from Parts
If you decide to build your DIY electric guitar from parts you obtain yourself, you bring a lot of flexibility to your project. It offers the freedom to select the body you want, including both the shape and the wood, and to pair it with an neck that has your choice of fretboard material and headstock design. After those are selected, they can be fitted out from a broad selection of appropriate pickups, bridges, and tuning machines along with specific electronic components and custom wiring configurations.
Unless you have very specialized tools and woodworking skills, you will probably want to purchase a neck complete with truss rod, fingerboard and frets already installed. Some builders want to make their own guitar body, perhaps from wood that has some significance or sentimental value. Body blanks pre-routed for the neck and pickups are commercially available for those lacking a good router and templates, making it much easier to create a DIY electric guitar with a custom body shape. Of course, unfinished guitar bodies are readily available.
A matched neck and body can be purchased together, which is basically a kit without the hardware. Higher end manufacturers that offer hardware options will often also sell just the neck and body alone. You may also find lower end manufacturers such as Pango offering kits with and without hardware. Read the reviews, and be careful of cheap junk that you ultimately may not be able to use for the intended purpose.
One advantage of building a Partscaster is that you can use left-over parts that may be laying around. In a couple of instances, I have had an unused body or an extra neck and decided to turn them into another DIY project. That can help to reduce the cost of the Partscaster.
Drawbacks of Building from Parts
The biggest drawback to building from parts is the overall cost. Building a DIY electric guitar or bass from individual components will almost always be more costly – and often a lot more costly – than just buying a kit. That doesn’t mean you shouldn’t do it. Before starting a build from parts, have a plan. Know what the end result should be, where you will obtain what is needed, and the anticipated cost.
Suppose one of you wants to build a tower. Will he not first sit down and estimate the cost to see if he has enough money to complete it?
(Luke 14:28 NIV)
Another important consideration for a Partscaster is making sure the parts will all go together. Some are more obvious than others – for example, you won’t attach a bolt-on neck to a body prepared for a set neck. Less obvious is whether or not a bolt-on neck will properly seat in the bolt-on neck cavity. It is possible to install a Strat-style neck with a rounded end into a Tele-style cavity that is squared off. However, the squared Tele-style neck will not fit into the rounded Strat-style cavity without modification.
Make sure the scale of the neck used is compatible with the body, especially if the neck cavity and bridge locations are already fixed. Controls that go into an access hole in the back and through the body have a longer shaft than the controls that mount to the pickguard. Some hard-tail bridges still need a string-through configuration. Fender-style bass tuning machines require a larger hole than Ibanez-style tuning machines. When you are building ala carte from parts, all of these and more must be taken into consideration.
Some of My Partscaster Builds
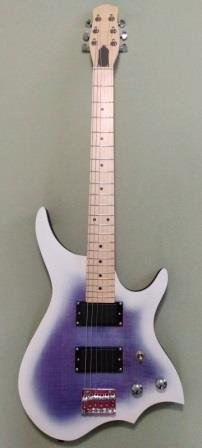
My first Partscaster build was the result of having an extra guitar body, a replacement sent for a kit where the original body had some defects. The replacement also had the same issues with the veneered top, so I kept the original kit together and used the replacement body for a Partscaster. Though the body is very similar, I used a neck with a maple fingerboard and 3×3 headstock design. The bridge is configured differently – for the kit, I had modified it to a string-through design. For this Partscaster, I stayed with a top-loading bridge, which made it easy to position for proper alignment.
I used a good set of humbucker pickups without exposed poles, the same as on the original kit. Inititally I experimented the configuration and wired the pickups with two volume controls and no switch, but eventually went back to the switched pickup with a master volume and master tone. I am quite satisfied with both the original kit and the Partscaster.
Even though the body itself was “free,” the overall cost of this Partscaster was more than the kit.
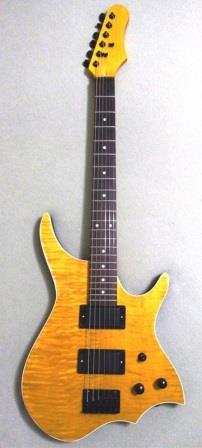
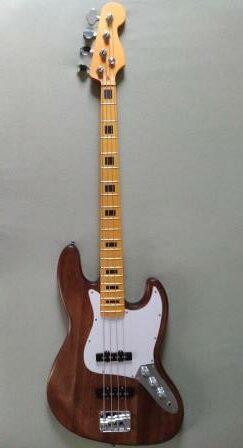
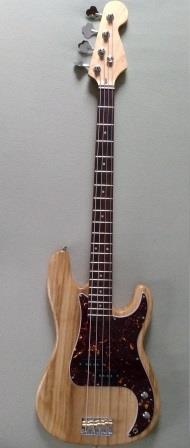
After building my first DIY electric bass kit, I realized the neck from the kit was not what I wanted. It was wide like a Precision-style bass, and I really wanted a Jazz-style bass. So I bought a new, narrower neck and swapped it out on the completed kit. The original kit neck became the start of a Partscaster bass. I bought a P-style body, and went from there. In this case, the new bass with the old neck was less costly than a P-bass kit, but the new neck on the first Jazz bass made that one of the more expensive projects I have done.
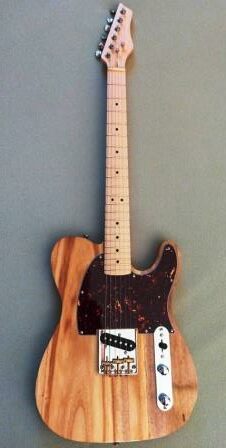
I wanted to try a single pickup Tele Esquire, and made a list of all the parts I would need. Over a period of time I was able to pick up many of the components on sale or at discounted prices, and constructed the Esquire Partscaster at a very reasonable cost. I modified a pre-assembled Tele-style control plate for the three position single pickup configuration, but in the end I did not like the sound. So I ordered a new pickguard and neck pickup, restored the control plate to the original wiring, and ended up with another standard Tele-style guitar. I like it. Don’t be afraid to make changes as you go.
Do you have experience with a “Partscaster” or a kit that you have modified? Tell us about it in the comments below.
