What is the best beginner DIY guitar kit? There are hundreds of DIY electric guitar kits to choose from. If you are a beginning kit builder, you will want to select a kit you know you are able to complete. A good kit-building experience is not only rewarding, it will give you the confidence to try another one, maybe one a little more challenging.
So which kit is best? Again, there are hundreds of them. The best first-time kit today may not be the best one next year or even next month. Offerings and availability change. And personal preferences differ, so this isn’t a one-size-fits-all answer.
We won’t attempt to select one particular kit out of this mix and sell it to you. Instead, in this post we will give you a lot of things to consider before selecting one yourself. Perhaps you will want to make a checklist and decide which of these is more important in your situation.
Choose a DIY Electric Guitar
That might sound simplistic, but this does narrow the scope a little. An acoustic DIY guitar kit is probably not going to be your best starting option. Acoustic kits usually require advanced skills and a more elaborate set of tools and fixtures. Mistakes are less forgiving and often are not easily corrected.
On the other hand, a DIY electric guitar kit doesn’t normally require special tools. Most of the time if you do something wrong you can simply back up and do it over. You may leave a few scars, but you aren’t likely to damage it beyond being playable. The scars are just learning badges.
And electric guitar parts are plentiful. For example, if you somehow mess up the bridge or a pickup, just jump on Amazon to find and order a replacement and be back on the project in a couple of days. It is just as easy to modify your guitar later if you want.
If you really want to try an acoustic DIY guitar kit, consider starting small. Real small, like a ukulele. They are pretty inexpensive, and give you the opportunity to get some idea what you are facing before you start on the pricey full-sized DIY acoustic.
Choose a Bolt-On Neck
There are two basic options when it comes to attaching the neck to the guitar: bolt-on and glue-on. The glue-on or set neck requires a little more skill, not to mention materials. You will need at least one and preferably two good quality clamps with protective padding. And you will need a good wood glue, like Durabond, that doesn’t come in the kit. Mistakes while installing a set neck are not easily corrected.
That’s not to say you should never try a set neck. Actually, the second kit I built had a set neck, and I learned a lot. It ultimately turned out fine, but the joint slipped as I was clamping it. And I left a mark on the back of the guitar, which I was able to get out with a damp rag and a hot iron. It was a little stressful, and I’m glad it wasn’t during my first DIY electric guitar build or I might nave been discouraged from trying another one.
Bolt-on necks are usually held in place by four wood screws. They interface with the back of the guitar by either a metal plate or metal finish washers. I’ve done both the plate and the washers, and don’t see a particular advantage of one over the other. Make sure you have the neck tight against the body (I use a clamp) and that you don’t fight the screws and break them off.
If you ever needed to make a repair or adjustment, a bolt-on neck is much easier to work with. In this post about one of my builds I describe removing a bolt-on neck and adding shims for adjustment.
Shaped or Blade Headstock
Some kits come with headstocks that are already cut to some design shape. The only thing you need to do is apply a finish, install the tuning machines, and attach the neck to the body.
Others will come with a squared-off spade or blade headstock. You could use them as-is, but that wouldn’t look very good. They are intended to be shaped into some design, either a recognized form or something you customize. That takes some additional effort and patience, and I’ve described the process in my post, How to Shape a Headstock.
Simple Bridge Construction
Installing the bridge might not be the first thing you think about when selecting a kit, but it has the potential to be a very frustrating part of the build. The bridge is part of the termination of the strings on the guitar, and where the final length of the strings is set during intonation, and is part of the termination. They are not all the same.
Most bass guitar kits and most Tele-style kits will come with fixed, hard-tail bridges that terminate the strings on the top of the guitar. These are the easiest to install, and is a primary reason that we recommend a bass or a Tele-style kit for your first project. You will simply screw the bridge to the top of the guitar, and install the strings from the end of the bridge.
Strat-style guitars usually have a tremolo bridge. Though it is similar to the Tele hard-tail, it sits in a cavity that goes all the way through the guitar, attaching only at the front of the bridge. It also requires that you stretch tension springs – usually three – from an anchor plate on the back of the guitar up to the bridge. Strings are fed through the bottom of the guitar.
The other common type of bridge isthe Tune-O-matic. It is often used in Gibson-style kits – LP, SG, Explorer, etc., and on PRS-style kits. Tune-o-matic bridges set on posts that are inserted into the top of the guitar. Many times the strings terminate in a separate stop piece that requires a second set of posts. If you choose a kit with a Tune-O-Matic bridge configuration, check to see if the holes are pre-drilled. If they are not, it means you will need to determine their location and be able to drill them perfectly round and perfectly straight. That probably means a slow speed drill press.
Pre-Wired Controls
Many kits come with pre-wired controls. This means you do not have to follow a wiring diagram and assemble the electronic components. A P-style bass kit already has the controls and jack mounted to the pickguard, so all you need to do is attach the pickups. A Strat-style kit will even have the pickups already wired on the pickguard. In other kits, like the Tele-style or J-style bass, the pre-wired controls are on a plate that mounts on the front of the guitar.
Kits that do not have pickguards usually allow for installation of the controls through a cavity in the back. They may or may not be pre-wired and will still require the pickups and the jack plate to be connected.
Hollow-body kits usually require that the controls are passed through the f-hole cutouts and manipulated up through holes in the top. This can be a very tedious process.
Many kits come with solderless connections. After installing the electronic components, the pickups, jack plate, or other things connect via plugs. If your kit is not solderless, be prepared to use a soldering iron and your soldering skills and to follow a wiring diagram.
Regardless of whether or not it is included in your kit, be sure to run a ground wire to the bridge.
Easy To Finish Wood
Consider how you will finish your DIY electric guitar kit. The easiest finishes to apply are those that allow the grain to show, like dye, stain, polyurethane, or oils. Mahogany is one of the most popular woods used in guitar kits. You may also find ash or maple, and frequently you can find veneered surfaces. A lot of kits are made with basswood. In my experience, basswood is NOT a good wood for a natural finish. It is fine if you want to use paint or some other opaque finish.
Fingerboards also need to be finished. If your kit has a rosewood or similar fingerboard, you will need to protect it from whatever you are using on the neck. Right before stringing my guitar kit, I apply a lemon oil treatment to rosewood. If your fingerboard is maple, you can usually finish it with the same thing you put on the neck. Personally, I like a tung oil finish on maple fingerboards. Make sure you consider the fingerboard when choosing your kit.
Finishing the wood is the most time-consuming part of the project. When you are selecting your first kit, give careful consideration to whether or not the wood is suitable for the finish you have chosen.
Our Conclusion and Recommendations
What is the best beginner DIY guitar kit? We recommend that you choose something relatively easy that will give you enjoyment and a sense of accomplishment. After you finish that, you will feel confident to move on to something more challenging.
Our first recommendation is a DIY electric bass guitar kit. These are nearly always bolt-on necks with top mounted bridges. A bass with a natural wood finish is a real beauty. An electric bass is one of the easiest kits there is to build.
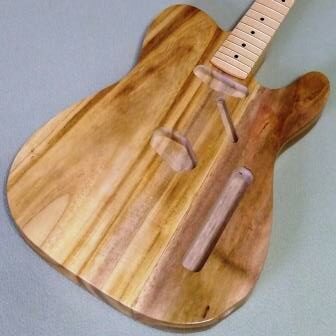
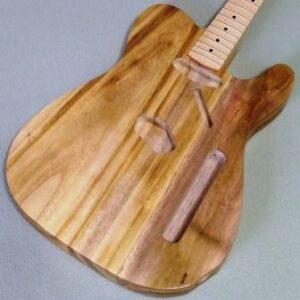
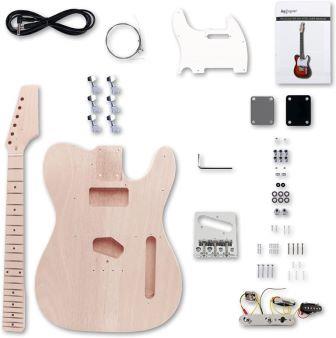
If you don’t play bass or prefer to build a 6-string electric, we would recommend a Tele-style kit. Again, these kits almost always have a bolt-on neck and top-loading hardtail bridges. Parts are readily available, and a Tele-style kit is very easy to upgrade when it comes to pickups, controls, or bridges and saddles. Change the standard pickguard for a custom look. Consider using a colored dye on the body to accent the grain and give it some character, finished with clear poly or lacquer.
A Few of Good Choices
Bexgear P-Bass Style
- Bolt-on neck
- Shaped headstock
- Fixed hardtail top-load bridge
- Four adjustable bridge saddles
- Pre-wired controls on pickguard
- Plug-in connection – no soldering
- Okoume body (similar to mahogany)
- Maple neck
- Composite ebony fingerboard
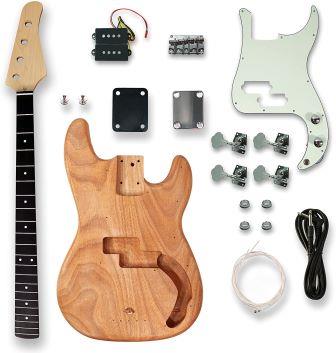
Solo PBK-1 P-Bass Style
- Bolt-on neck
- Shaped headstock
- Fixed hardtail top-load bridge
- Four adjustable bridge saddles
- Pre-wired controls on pickguard
- Requires soldering
- Mahogany body
- Maple neck
- Rosewood fingerboard
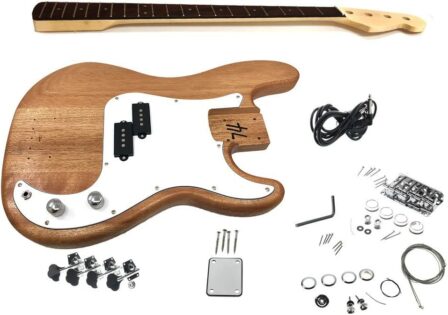
Fistrock P-Bass Style
- Bolt-on neck
- Blade headstock requires shaping
- Fixed hardtail top-load bridge
- Four adjustable bridge saddles
- Pre-wired controls on pickguard
- Requires soldering
- Paulownia body (nice grain)
- Maple neck
- Dyed poplar fingerboard
Read about my Fistrock P-Bass build.
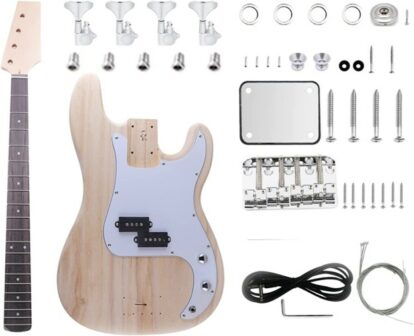
Bexgear Tele Style
- Bolt-on neck
- Shaped headstock
- Fixed top-load Tele-style bridge
- Three adjustable bridge saddles
- Pre-wired control plate
- Plug-in connection – no soldering
- Okoume body (similar to mahogany)
- Maple neck
- Composite ebony fingerboard
View at Amazon
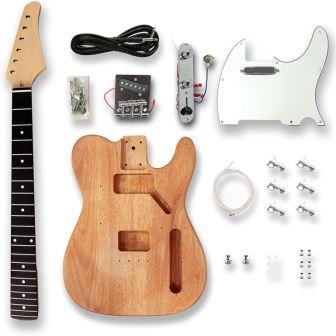
Solo TCK-1-SD Tele Style
- Bolt-on neck
- Shaped headstock
- Fixed top-load Tele-style bridge
- Three adjustable bridge saddles
- Pre-wired control plate
- Plug-in connection – no soldering
- Basswood body with black binding
- Maple neck
- Rosewood fingerboard
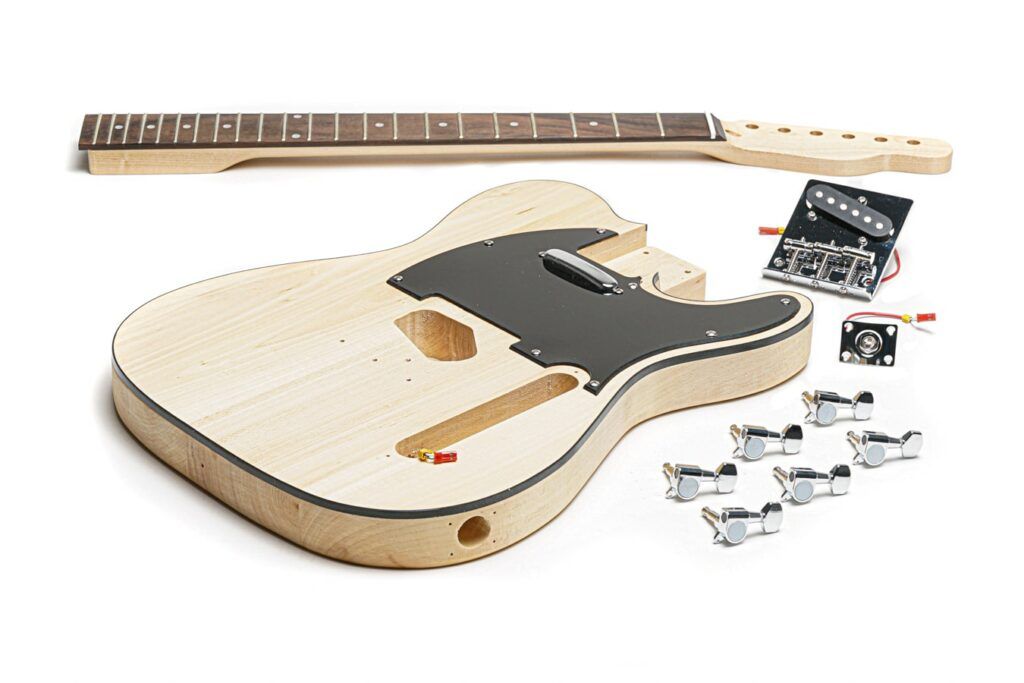
Fistrock Tele Style
- Bolt-on neck
- Blade headstock requires shaping
- Fixed top-load Tele-style bridge
- Three adjustable bridge saddles
- Pre-wired control plate
- Plug-in connection – no soldering
- Ash body
- Maple neck
- Rosewood fingerboard
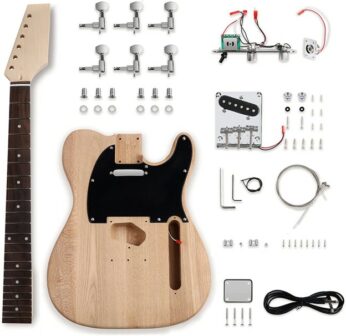
Leo Jaymz Tele Style
- Bolt-on neck
- Blade headstock requires shaping
- Fixed top-load Tele-style bridge
- Three adjustable bridge saddles
- Pre-wired control plate
- Plug-in connection – no soldering
- Mahogany body
- Maple neck
- Maple fingerboard
Read about my Leo Jaymes Tele-style build.
What did you experience with your first DIY electric guitar kit? If you have any stories or advice you would like to share, please leave a comment below.
